Make a note. Compressor refrigerators are nice, but they draw significant amounts of power. Ours is large, poorly vented and poorly insulated, so it sucks (power).
We’d like to be able to stay away from electric campgrounds more often, but because the 200W of rooftop solar doesn’t keep up with the refrigerator, our battery capacity still limits how long we can stay off-grid without idling the engine, running the generator or driving around to charge the batteries.
Potential solutions:
- Fix the fridge. Either replace it with a smaller, more efficient unit or somehow add more insulation. Finding a fridge that fits into an existing cabinet is hard.
- Add more lithium batteries @ $1000/ea. This would extend the off-grid time but would also increase the amount of engine/generator/driving to fully recharge the batteries. I could re-design the circuit that feeds current from the Transit alternator and reduce idling/driving time – I figure that the Transit alternator can charge at 80A or more without smoking – or I could install a somewhat larger converter and reduce generator run time. I’d rather not idle the Transit or run the (noise) generator at all though. Especially the (noise) generator.
- Add more solar. The roof has no space and I don’t like parking in the sun, so portable solar should work better in our case.
Other than cost, the issue that I have with portable solar is the difficulty in finding a place to store the solar panels when not in use. Some panels fold up into relatively small ‘suitcases’, some panels are flexible but not foldable, and other panels are rigid glass & aluminum. From what I can tell the suitcase style panels are lower quality, higher cost, and less efficient. The glass/aluminum panels are heavy and harder to store, but more efficient and longer lasting. The flexible panels have a reputation for failing early and often, but are lighter weight and easier to handle.
Plan A:
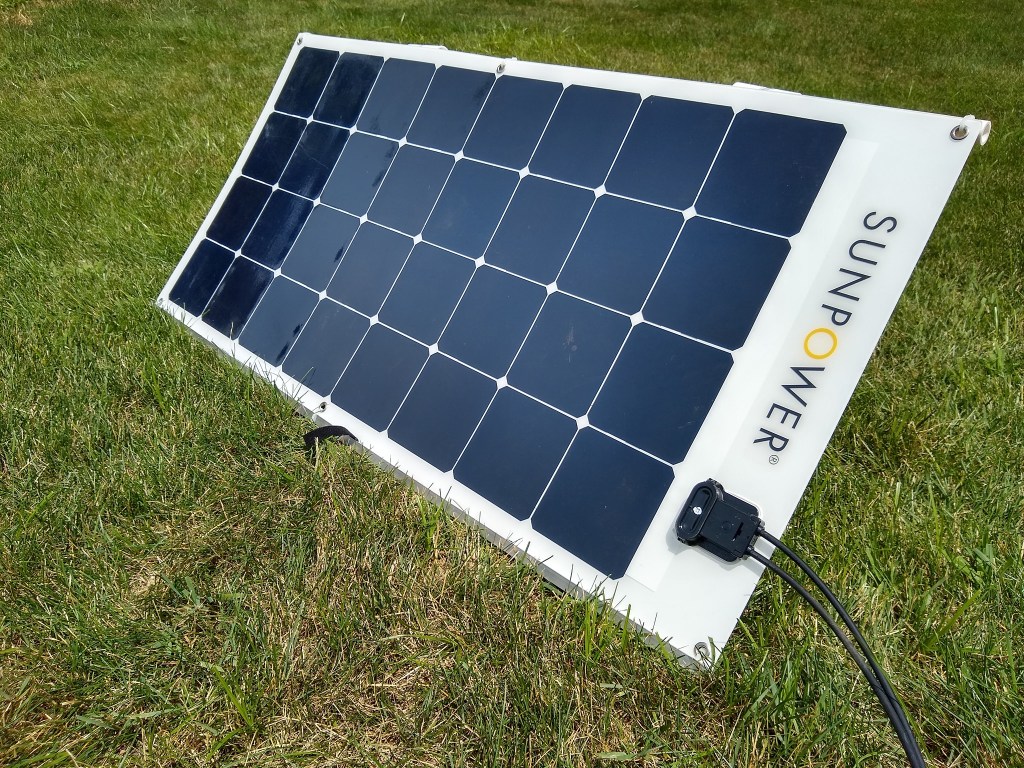
After much thought, many YouTube reviews and three beers, I decided to buy a pair of 110 watt SunPower flexible panels and a Victron MPPT 75/15 SmartSolar controller from sunpoweredyachts.com. Victron makes good quality, no-excuses solar equipment and the SunPower panels seem to be energy efficient and well made. I figured that the 75 volt/15 amp controller would be adequate.
To test the panels and experiment with various setups I wired the new Victron controller to the AGM battery bank. The Redarc B2B that charges my lithium battery has an MPPT controller built in, so I can use the Redarc to charge the lithium batteries.
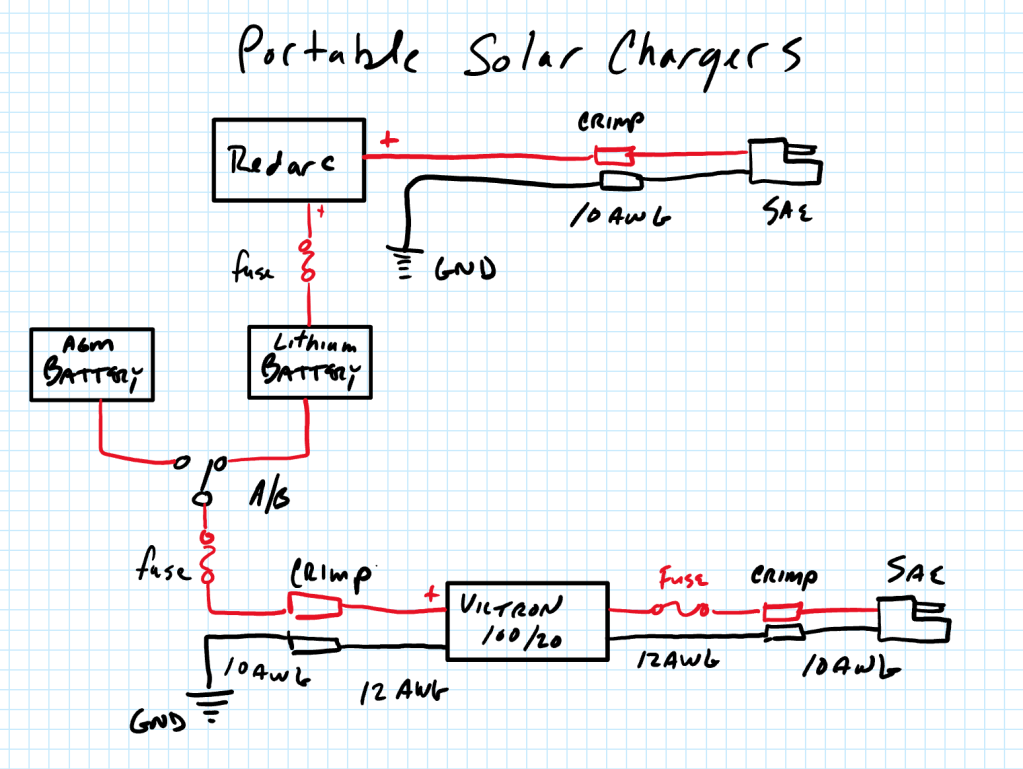
I outfitted both the Victron controller and the Redarc B2B charger with SAE-style connectors on the solar inputs. I built and bought a variety of 10ga. and 12ga. SAE and MC-4 cables and Y-connectors so that I’m able to attach the solar panels to either the Victron controller (AGM) or to the Redarc charger (lithium). The Victron can handle the 18 volt SunPower panels in either series or parallel so I set up connectors and adapters for both. Because the Redarc MPPT controller has a 30 volt maximum solar input I have to parallel the panels when charging the lithium. I can also use one panel on each battery bank.

The panel-to-panel connections and Y-Cables are MC-4, the extension cables and connections to the chargers are SAE. I did that because…after three beers it sounded like the way to go.
Testing
My initial testing indicates that the 110W SunPower panels are more efficient than the OEM GoPower 100W rooftop panels, the Victron MPPT controller is more efficient than the OEM GoPower PWM controller, and pointing the panels at the sun makes a big difference in output. When pointed directly at the sun mid-day in June I was able to charge the AGM’s at more than 15A, maxing out the Victron 75/15 charger. A Victron 100/20 is on order installed and the 75/15 has been re-purposed as a replacement for the OEM GoPower charger.
Pointing the Panels
Pointing the panels directly at the sun is important so I rigged up some PVC pipe and aluminum ‘C’ channel to stiffen the panels, make them easier to handle and provide a means of propping them up. It’s a mashup of 1/2″ PVC, 1/4″ Aluminum ‘C’ channel, 3/4″ x 1/2″ tees that fit loose on the top PVC, and a couple of elbows on the legs.


The PVC and aluminum are fastened to the panels with nylon ties. Rather than gluing the elbows I ran a self-drilling sheet metal screw into each joint. That way I can re-design without buying new fittings.
The PVC frames need a bit more work. I need a means of fixing them to the ground and keeping them pointed at a particular angle without falling down or getting blown over.
No beers were harmed in the fabrication and testing of the panels and frames.
Storing the Panels
Storing the panels is still a problem. For now I’ve rigged them up with foam padding, Velcro and a bungee and attached them face-to-face on the back of the couch. I have to remove them before folding the couch though, so at night they either get stored under the campervan or up in the front seats.
Inconvenient, for sure.

Out with PWM
Because I guessed wrong on the first Victron controller (under ideal conditions the two SunPower panels can produce more than 15 amps) I ended up purchasing a Victron 100/20 for the portable panels. That’s a perfect excuse to toss the OEM GoPower PWM controller and replace it with the now surplus Victron 75/15. The GoPower panels will not produce 15 amps under any conditions, so the surplus 75/15 controller will be adequate.
The GoPower controller was mounted above the sliding door. That made sense, as it has an LCD display and looks nice. The Victron has no display and is ugly, so I mounted it inside one of the existing electrical cabinets and used the existing 8ga. wire to connect the panels in the new location. The new controller is closer to the batteries, so I think it’ll more accurately measure battery voltage and induce less voltage drop while charging. The voltage will still drop but the droppage will be on the solar side not the battery side. I think that’s a good thing.
I’m mitigating voltage drop somewhat by re-wiring the OEM GoPower rooftop panels in series instead of parallel. Current will be halved, voltage will double, voltage drop will be less – but they will be more susceptible to shading and shadows. If that turns out to be a problem I’ll switch them back to parallel.
The Victron 100/20 and 75/15 controllers are networked together so they share configuration information and charge profiles.
Diagrams


The ‘as built’ campervan electrical is described in detail on the Campervan Electrical page.
Update 08/2020: I originally connected to the solar controllers via SAE pigtails. That got annoying pretty quickly. I also observed that maintaining polarity and making sure that I didn’t over-volt the Redarc controller was unreliable. My solution was to build a small panel with SAE connections and a volt meter.
The plan is to:
- Connect the panels to each other in either series or parallel, as needed.
- Connect the combined panels to the voltmeter to verify polarity and connections.
- Connect the jumper coming from the voltmeter to the appropriate controller – either the Victron or the Redarc.

The red tape is because ‘red is up’ on all the connectors.
I ended up using jumpers because on the Victron controller, the solar panel grounds need to be carried back to the controller. I can’t use a simple A/B switch, but would instead have to find a 48v 20A DPDT switch of some sort.

Leave a comment