
To tackle power consumption I made two changes. The first was to add an inside disconnect for the remote propane gas valve. The propane disconnect draws just under 1A continuously as long as the propane is on. The Crossfit comes with a switch for shutting off the propane located outside by the propane fill. I added a switch inline ahead of the exterior switch. That allows me to reduce parasitic draw by almost 1A anytime that I don’t need propane.

The switch is an inexpensive Amazon sourced 12V switch + USB panel that replaced the Coachmen USB/Power port.
Venting the Refrigerator. The second, and more important project was to try to improve refrigerator efficiency with better venting. Coachmen built the van with no effective venting and no effective insulation between the steel van exterior and the fridge compartment. The lack of venting and insulation meant that the refrigerator ran more often than necessary, consuming more power that expected.
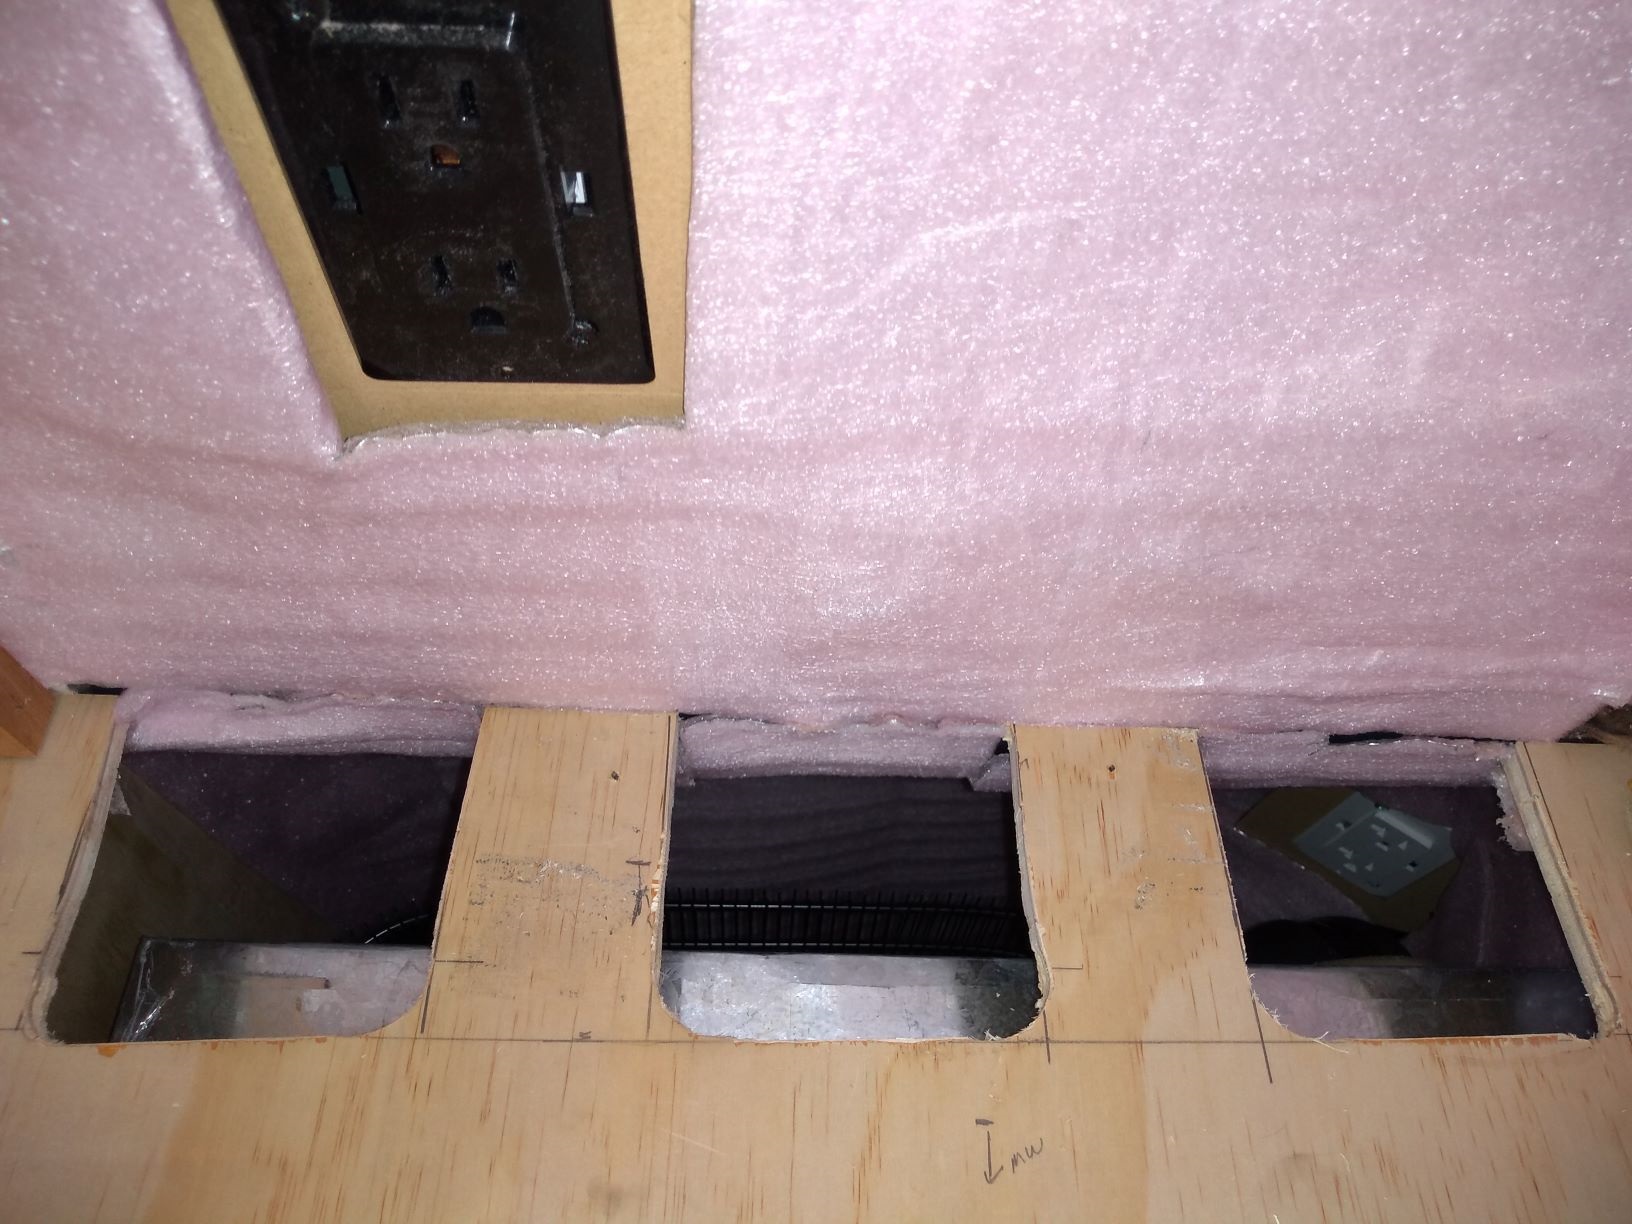
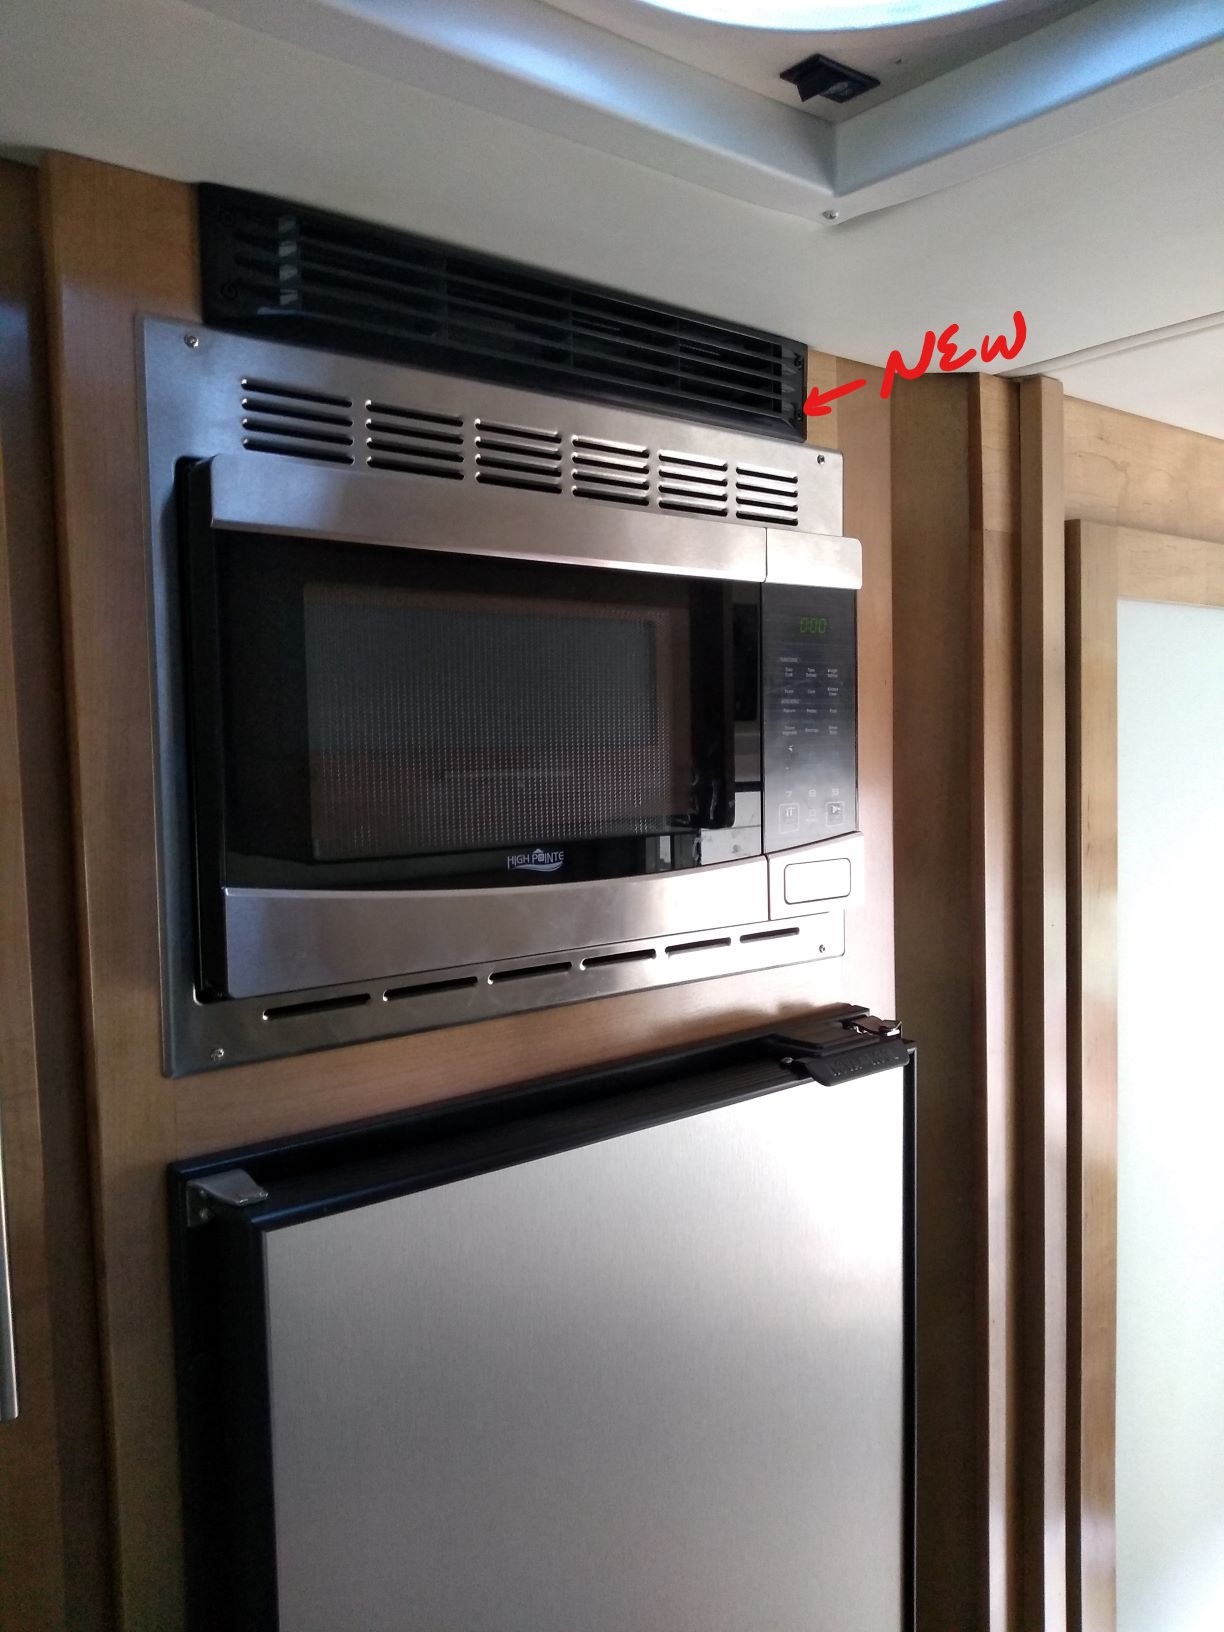
Coachmen attempted to correct this with a TSB that added vents below the fridge compartment, between the fridge and microwave, and above the microwave; and added a layer of insulation that attempted to create a chimney effect from bottom to top. My dealer performed the TSB. Even with those modifications, on a hot day the fridge ran continuously but could only cool about 40 degrees Fahrenheit – so a 90 degree coach would result in a 50 degree refrigerator and a 100% duty cycle at about 5.5 amps. The microwave compartment would be as high as 115F on a 90F day. When it was that hot, it I suspect that the heat from the back of the fridge would be trapped behind the fridge so the fridge could not cool the interior. I also noticed that the dealer didn’t make a strong effort to follow the details of the TSB. For example, the instead of opening up a 3 x 12″ hole in the bottom of the fridge cabinet, they simply drilled 3 – 3″ holes, half covered by the fridge bottom. Likewise, they drilled 3 – 2.5″ holes in the top, half covered by the fridge.

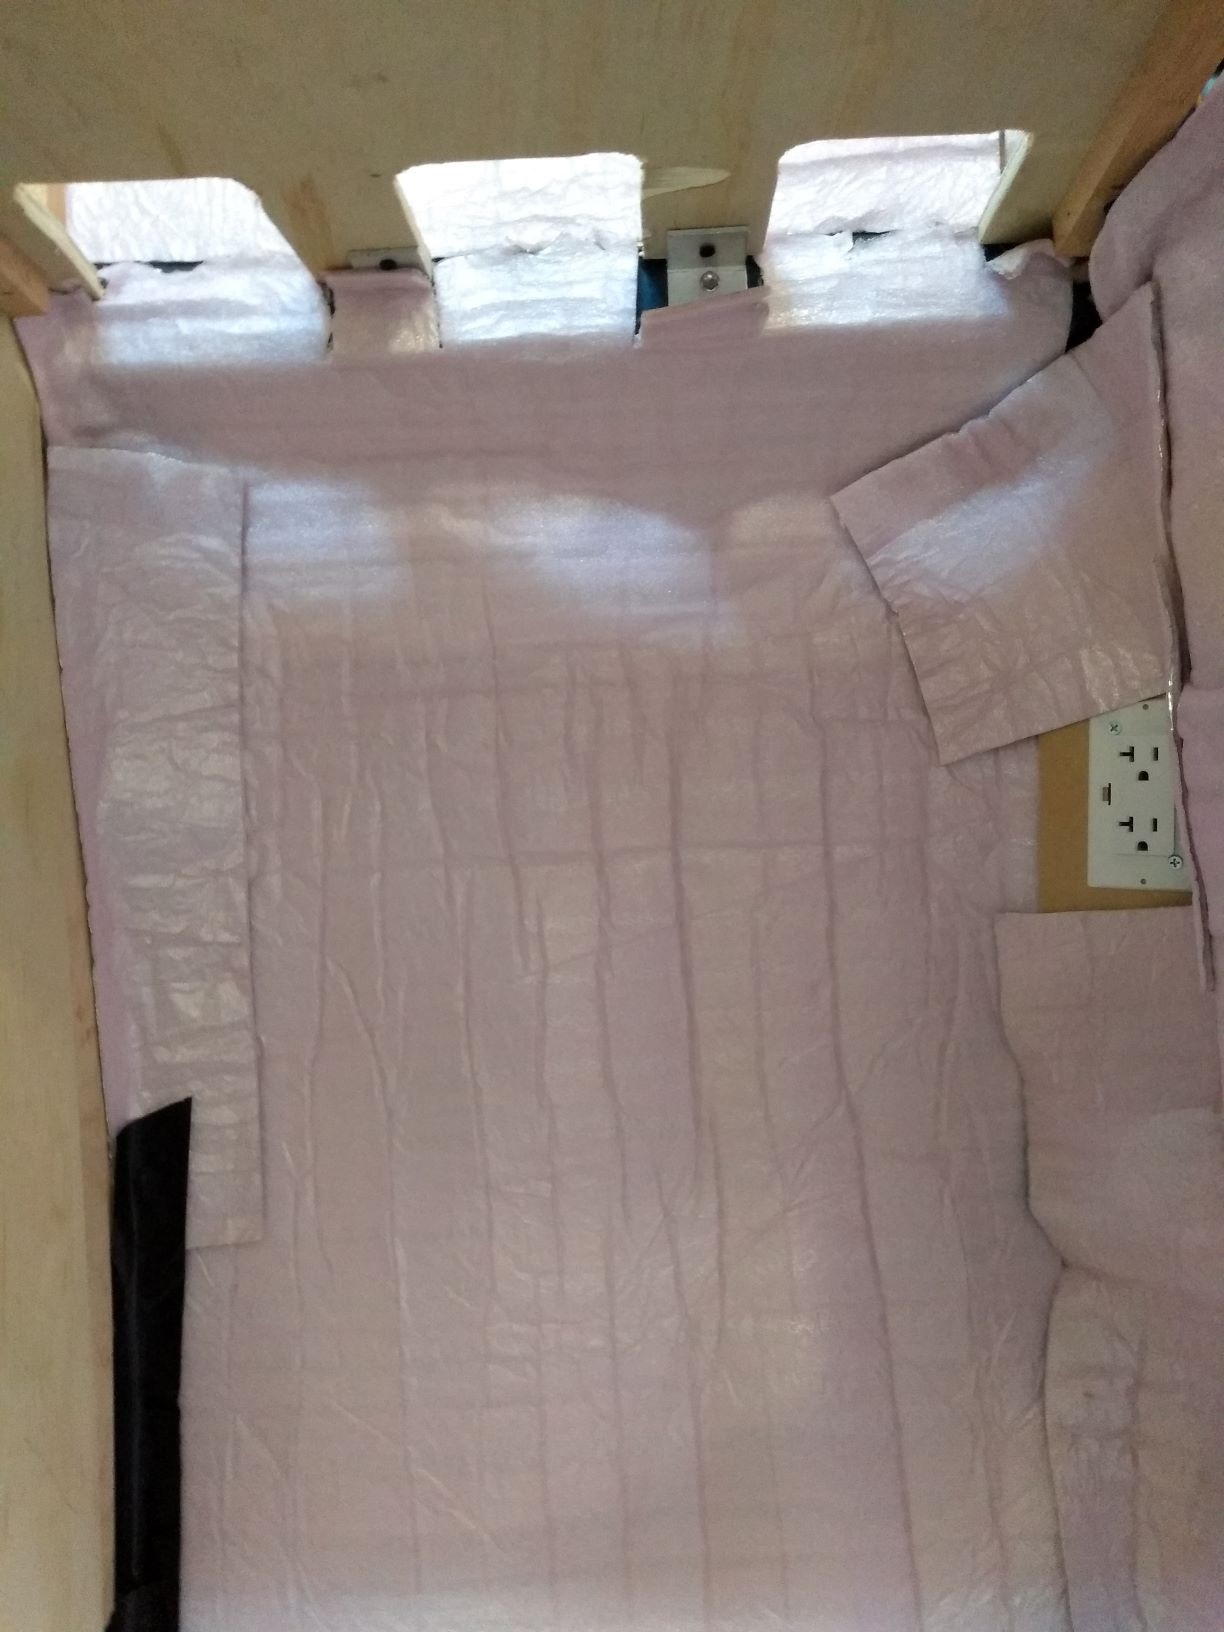
I went back through the TSB, pulled the refrigerator, and did what was essentially a more thorough version of the TSB. After re-enforcing the platforms that held up both the microwave and fridge, I opened up larger vents between each and made a larger vent above the microwave, covered by a black vent cover.
I then re-positioned the ‘blanket’ insulation so that the compartments were better isolated from the steel exterior, moving a bundle of wires and a water line to make room. I also added 12V computer fans pushing air up from the fridge compartment into the microwave compartment, and out through the top vent. I used Gorilla tape to keep the insulation from shifting.
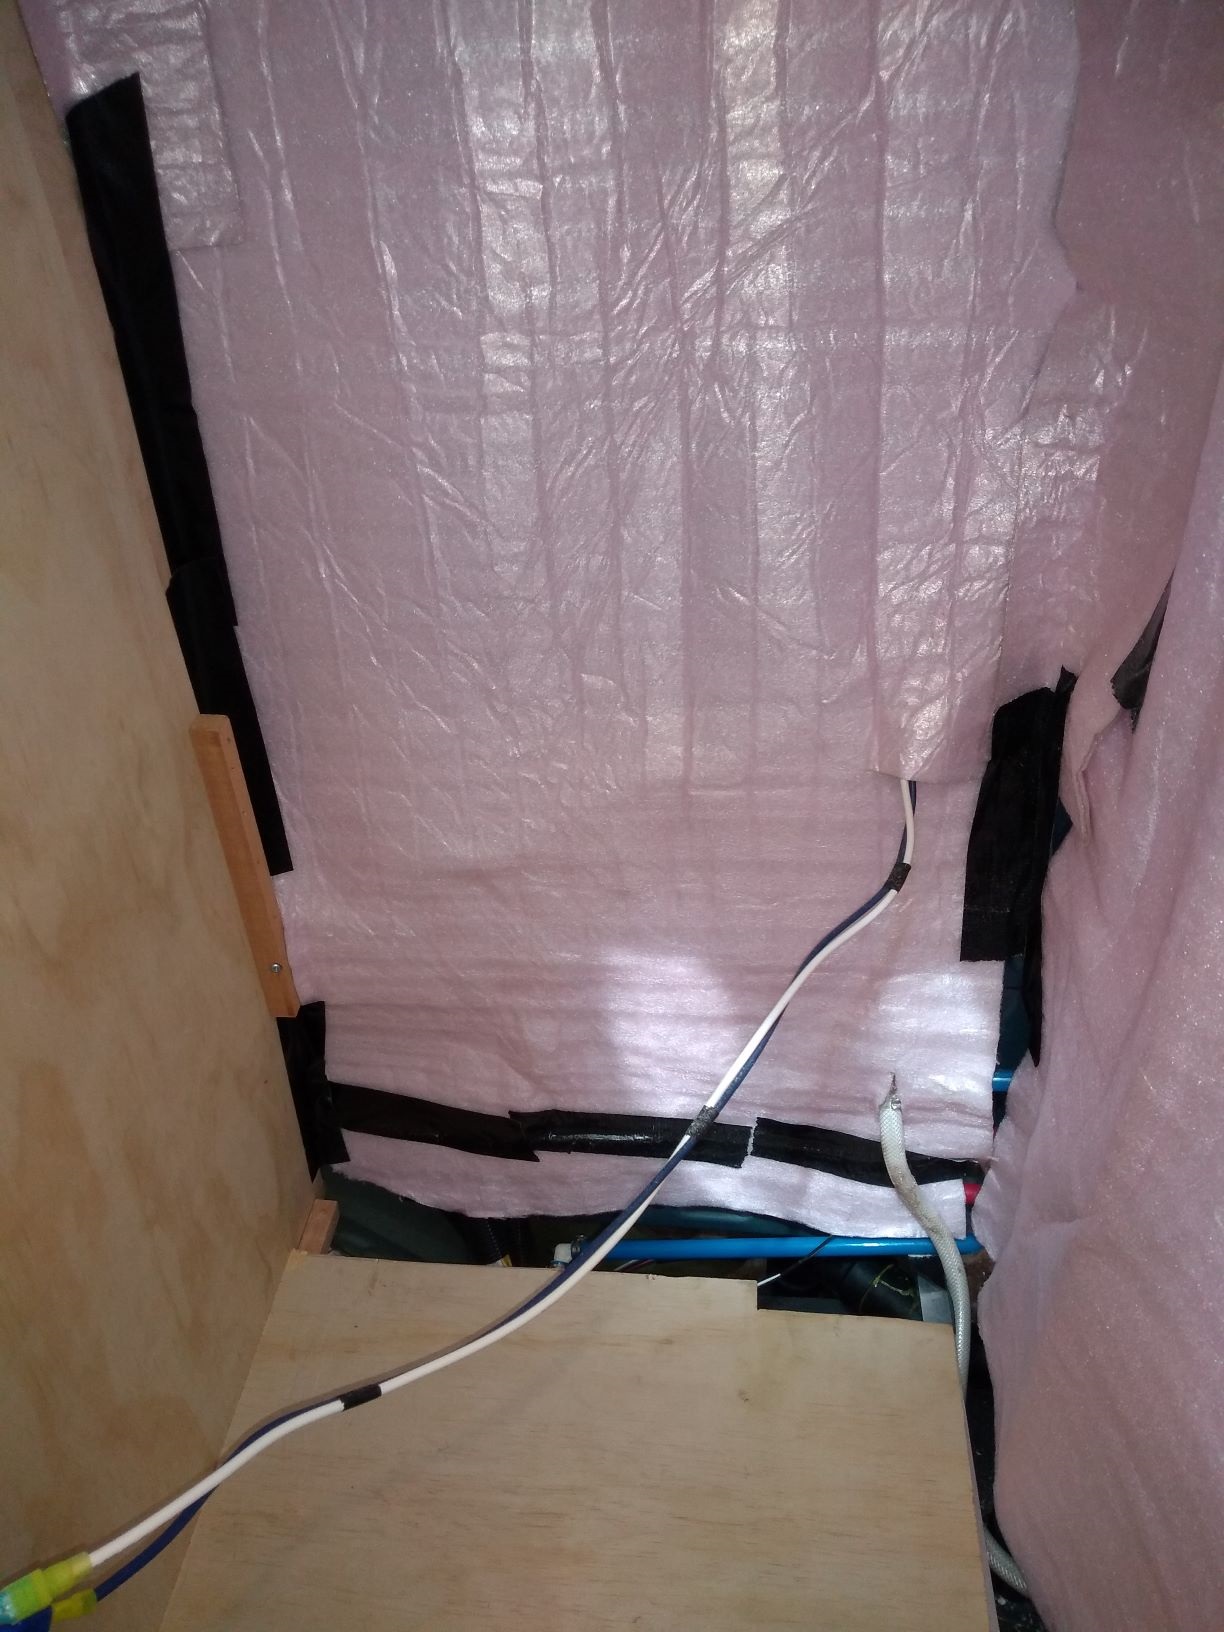


I’ve experimented with several different computer fans – fixed speed, temperature sensing, both 80mm and 120mm, and from one to three fans. I currently have two 120mm fixed speed ‘pressure’ fans, supposedly designed to move air under pressure (not shoen). I wired the fans into the switch panel shown above so I can flip them on an off as needed.
It looks like the microwave compartment is much, much cooler, and with the fans running, I have about 55 degrees of cooling capacity. I think I’ll do a few more tweaks before next summer though.
